Monday, June 29, 2009

More Yard

We put in another full weekend of work on the yard. This included two trips to Home Depot and a whole lot of manual labor.

I feel like this is becoming more of a photo blog: high on images, low on commentary. It's probably what folks are more interested in anyway, assuming anyone is interested at all (Hi Laura!).

Unrelated to the yard, another project we worked on this weekend was finalizing our bike theft deterrent system. After two thefts, we wanted to come up with something really solid. We researched the actual bike racks, but they were very pricey. So we bought a $10 fence post instead and then modified it. Here is Seth working on drilling through the post:

It was tough to find the right combination of tools (thank you again to the kind folks at the Tool Lending Library), but we finally got it working and it doesn't look half bad:

Back to the yard. It started with a little late night painting from Ilana, who "rescued" this old trellis from abadonment:

The next day, Seth stacked the stones:

This was the reason for two trips to Home Depot. These are ridiculously heavy, and moving them from the HD shelf to the cart, from the cart to the car, and the car to the yard takes a toll. Not to mention hammering some of them down so they fit on the ends. We then placed a planter box (a modified bench I built for Ilana, which itself was modified wood from an old model train layout) behind the stones and placed Ilana's painted trellis inside (with dirt, of course). Next we planted our new Star Jasmines, which Ilana then tied to the trellis.

The jasmine smells great, and helps us prove to Amanda that you don't need to buy a house just because the yard smells good. While Ilana worked on that, I hung our new cafe lights:

Here's the final product, with Ilana resting in the background:

And just for the comparison shot from earlier photos, here's the view from above:

And for the finale, here's the night shot with the cafe lights on:

Bonus Photo:
(Seymour looking at the lights)

Sunday, June 7, 2009

Summer Time, Yard Time

As the East Bay summer rolls in, we decided it was finally time to do something with our yard. We have neglected it ever since we moved in, and to be honest, it wasn't much to start out with. We're pretty sure that in the seller's efforts to "stage" the place, he just poured wood chips over the existing yard and planted a few bushes that have not grown up to be pretty adults. Ilana took charge of the project and did an amazing job of creating a design and then lining up some professional help at a very affordable price. Here's what we started with:

The aerial view makes it look better than it was -- think weed garden and litter box for every stray cat in the neighborhood. The week before we started work on it, I removed the ugliest little bush tree I've ever seen from smack in the middle of it. Our new friend Tony helped us clear the rest and carted off literally a truckload of old dirt:

Then after laying down some fresh soil came the job of arranging our new stones. Tony was amazing and had a vision the whole time, somehow knowing when to flip certain stones or rotate others to make the perfect jigsaw puzzle.

That's Little Tony with the broom. He looks more helpful in the photo than he actually was. But we're pretty pleased with the final product:

Here it is from the ground level, though this shot was taken before we decided to move the table to the corner:

That's a Japanese Maple that we planted and are very excited about. And just in case you didn't think we did any of the work, here I am doing some fine-tuning:

We've also added two miniature succulent gardens and have plans for some more potted adventures.

We're really happy with the outcome and feel that we've added another room to the house with this very manageable, livable outdoor space. Special thanks to Marilyn for encouraging the project. Bring on the summer BBQs!

Monday, June 1, 2009

A Box for a Box (and an Old Friend)

We took on a new small project this weekend: we built a box for a box. Keep reading to find out why.

Here I am putting the final touches on a very simple wood box.


And here Ilana is putting in the parquet flooring (stick 'em squares, really).


And here is the purpose. Look at the bottom of the photo: the box is on the floor. Now that we removed the water heater from the upstairs closet (did we mention that we got a tankless water heater installed?), we decided to use the space for storage and to move Seymour's litter upstairs. The homemade box will help keep excess litter from getting into places it shouldn't. Moving the litter will allow us to lock him upstairs when guests are over, and adds more space to the tiny downstairs bathroom.


We also finally finished the kitchen.

All that means is that we re-installed our old friend the paper towel holder from the original kitchen in its near original location. It's pretty much the only item that survived from what was in the kitchen when we moved in. Ilana repainted it and insisted we put it back as an homage, but it's also pretty functional and officially marks that the kitchen is d-o-n-e.

Sunday, March 29, 2009

Television, and Some Catch-Up

One of the nice things about starting to wrap up some of the "structural" elements of our work is being able to shift to actually making things look good. One of our first steps in this direction was to get a TV cabinet from our good friends at IKEA so that we can keep our TV more out of sight. We're very pleased:


Ilana once again used her unique IKEA-building skills to put together this two-box challenge in record time with top-notch results.

If this public policy thing doesn't work out, it's nice to know she'll always have career options in putting together MARKÖRs and MALMs.


We've also recently uncovered a few more photos from our interim "mauve" paint job (now covered by Maritime "Ahoy!" White). Here's one:

Perhaps you can now see why we went back to the off-white. It's not a bad color, it's just not a living room color.


Also, we realized that we've yet to post pictures of our new light fixtures:

This is in our stairwell. Once again, Matt our amazing electrician came through. He replaced our two outdoor lights with motion detector lights, and then replaced our two horribly ugly, 60s/70s/80s chandeliers (they were so bad it's hard to know which decade to blame) with some nice new fixtures (that Ilana got from Home Depot with encouragement from my mom).


We also realized that our picture of the new light above the dining room table allows us to show you the progress from one specific sight line in our house: the kitchen looking towards the dining/living room. Here's the complete series, with our new light making an appearance in the last shot:


I'll leave you with one more photo I found: that of a very cute Ilana painting once her hand finally healed:

Sunday, March 8, 2009

Crown Molding

I'm not sure where Ilana got the idea for crown molding, but I'm glad she did. After we finished painting the walls the other weekend, the next step was to install crown molding. Luckily, Home Depot doesn't have a huge selection of molding for ceilings, so we got a small sample of one and brought it home. We hung up the 3 foot section to see how we felt about it. My mom came over and immediately asked, "is that upside down?" After doing some research online, we determined she was correct.

So it was back to Home Depot for the "Pro Pack" of molding, cut in half by a nice employee there so that I could fit all the pieces in the Prius. And now, you can simply follow along with our process:

Step 1: I laid out all the strips and painted them first. This was Saturday (2/28). I have to say it was a much more enjoyable process with the ability to listen to the Giants on the radio.


Step 2: Get a lesson on mitre saw from Seymour. The mitre saw was another amazing offering from Berkeley's Tool Lending Library. This was Sunday (3/1).


Step 3: Use mitre saw to cut molding. Many thanks to Jim F. for the molding book that specified the exact angles needed for our measurements. Nevermind that I misread the molding angle the first time and we had to take 4 pieces down off the wall to do them properly.


Step 4: Nail the crown molding up. That's right, by hand (the Tool Library doesn't have items that can be used as weapons, like nail guns).


Step 5: Enjoy the idea of the crown molding, complete with unfinished nail work.


Step 6: Wait one week.

Step 7: Fill the gaps and nail holes with goo. Ilana did an amazing job of completing my less-than-perfect angles and corners. This was yesterday (Saturday, 3/7).


Step 8: Use bare hands for truly sophisticated looking results.


Step 9: Paint the corners, connectors, and nail holes for a good finished look. Picasso-style is optional. Don't worry, this was just for the corners; I used a larger brush for the rest of my work.

Step 10: Enjoy. This is our best set of corners. Not coincidentally, they were also the last I installed. Further, our "closet" here has no texture, which also made it easier. Either way, it's a beaut!

This photo gives you a sense of the whole room.

Now we actually get to consider hanging up some of our awesome and almost forgotten artwork.

Tuesday, February 17, 2009

Lessons Learned

We're happy to report that the kitchen is pretty much done. In saying this, we learned an important lesson in home ownership: nothing ever really feels finished. There was no breaking of a champagne bottle over its bow to bless it. We simply finished up a few lingering projects and stopped putting "work on kitchen" on our to-do lists -- that pretty much marked the end point.


What's Plinth?

Perhaps that previous paragraph makes it sound like it was easy. That's never the case with our team! The last "real" project was installing the plinth and the baseboards. If you want to know what plinth is, just ask the good folk at IKEA (or drop a piece of cereal on our floor and see where it ends up).

Here is Seth, pulling out the plinth that we had so lovingly installed just moments earlier. Why, you ask? Well, we hadn't quite accounted for wanting to open the dishwasher ever again. The worst part was that once it was out (no simple task), we learned that removal was not necessary for solving the problem.

Lesson:
Before you undo work, make sure that it is absolutely necessary to do so.

And here is our secret weapon: Gorilla Glue. When all else fails, we turn to it. And sometimes, when nothing fails, we turn to it. We have to be honest: we didn't even try anything else for the baseboards. We cut the boards to size, squeezed on some glue, stacked bricks and soup cans next to them and went out to Barney's for dinner. Sometimes I fantasize about a young earnest couple moving into this place 40 years from now, hating the tacky 2009 decor and ripping out our beautiful kitchen. I like to imagine them saying, "What the f*ck?!?! Did they GLUE these baseboards to the wall?!?!"

Lesson: Sometimes you can get by doing it the lazy way.


Bring In The Moms


During the January "invasion of the moms," Marilyn and Leone joined forces to help us tackle a few vexing projects, such as painting the living room, selecting a new light fixture for the dining area, and finishing up a bunch of little projects in the kitchen. They worked their arthritic knees to their breaking points and, together, we got a lot done.

We couldn't get them to slow down long enough to take a clear photo. Leone did a lot of wall work in the living room, while Marilyn finished the kitchen paint job by doing all the trim and touching up the door.

Lesson:
It's amazing what can be accomplished when you double your labor power.

But here's the best part: neither one of them showed even a hint of frustration when, after spending the whole day painting our living room mauve, we decided to repaint. We loved the color -- we just didn't love it in the living room.

It was the first major "back track" moment that we had, and while it's a lot easier to repaint than re-floor, re-cabinet, or re-countertop, we were still disappointed. We spent about a month experimenting with new color ideas and finally landed on a very un-sexy, but sophisticated, beige. Special thanks to Cass Morris, the Benjamin Moore paint consultant for helping us make the final choice: maritime (ahoy!) for the walls, with dove white for trim and closet doors.

Lesson (aka, "The Moms' Tip of the Week"):
Our living room has some really weird light issues -- colors look different depending on which wall you're looking at and the time of day. Sometimes it's best to go with neutral paint and jazz the room up with accents.


Bring on the Abbys

About two weeks ago we were treated to a day of service from Abby-Squared Painting, Inc. We cashed in on a birthday gift that Abby C. and Abby N. never thought we'd take them up on. Turns out, the joke was on them.

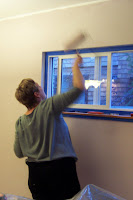
Abby C. may look sheepish, but she completely transformed our scuzzy closet. And Abby N. was a whiz with the roller. Plus, she only dissolved into a giggle fit once on the job.

Lesson:
The Abbys both have impressive painting resumes.

Even the infamous Flat Stanley wanted in on the fun.


That's about all for now. Stay tuned for adventures in crown molding...